How to Check Tire Pressure: The Complete Step-by-Step Guide
Whether you have a gauge, a gas station air pump, or nothing but your own two hands, here’s exactly how to check your tire pressure correctly — for any car, truck, motorcycle, or bike.
Nearly a quarter of vehicles on American roads are driving around with at least one tire that’s significantly underinflated — and most drivers have no idea, because you genuinely cannot tell by looking. A tire can lose up to 20–25% of its air pressure and still look perfectly round to the naked eye. That gap between “looks fine” and “is actually fine” is exactly why knowing how to check tire pressure properly, and doing it on a regular schedule, is one of the simplest and highest-impact pieces of car maintenance anyone can do.
This guide walks through the full process from start to finish: the tools you need, the exact steps, how to do it without a gauge in a pinch, how to find your car’s recommended PSI, and a model-by-model rundown of digital dashboard displays for the most popular vehicles on the road. By the end, checking your tire pressure will take less time than it took to read this paragraph.
What’s in This Guide
- Why Tire Pressure Actually Matters
- Tools You’ll Need
- Step 1: Find Your Recommended PSI
- Step-by-Step: How to Check Tire Pressure
- When to Check (Cold vs. Hot Tires)
- How Often You Should Check
- How to Check Without a Gauge
- How to Check at a Gas Station
- Checking Pressure via Your Dashboard (TPMS)
- Car-by-Car Dashboard Reference Table
- How to Check Your Spare Tire
- Motorcycles and Bicycles
- Common Mistakes to Avoid
- Seasonal Tire Pressure Changes
- A Simple Monthly Checklist
- Frequently Asked Questions
- Conclusion
Why Tire Pressure Actually Matters
Tire pressure sounds like a small, boring number, but it quietly affects almost everything about how a vehicle behaves. The National Highway Traffic Safety Administration has repeatedly linked underinflated tires to reduced vehicle control, longer stopping distances, and a meaningfully higher risk of tire failure at highway speed. It’s one of the few maintenance checks that takes under two minutes and directly touches on safety, fuel costs, and how long a set of tires actually lasts.
- Safety: Underinflated tires flex more, build up heat faster, and are far more prone to blowouts, especially on hot pavement during long summer drives.
- Fuel economy: The U.S. Department of Energy estimates that fuel economy drops roughly 0.2% for every 1 PSI drop across all four tires — small per tire, but it adds up over a year of driving on soft tires.
- Tread life: Underinflated tires wear unevenly on the outer edges, while overinflated tires wear the center of the tread faster. Either way, you’re replacing tires sooner than you need to.
- Handling and braking: Correct pressure keeps the full width of the tread in contact with the road, which is what your car’s traction control, ABS, and cornering grip are all designed around.
- Ride comfort: Overinflated tires transmit more road noise and a harsher ride, while properly inflated tires absorb bumps the way they were engineered to.
Tools You’ll Need
You don’t need a mechanic’s toolbox for this. Most people already own everything required, or can pick it up for under $15.
- A tire pressure gauge — pencil-style, dial, or digital. Digital gauges are the easiest to read accurately and are widely available for $8–$15.
- Your owner’s manual or the door-jamb sticker — this is where the manufacturer’s recommended PSI lives.
- An air source — a portable 12V air compressor for home use, or a gas station air pump, if a tire needs topping up.
- A flashlight (optional) — handy for checking pressure in a dim garage or at night.
- A pen and notepad or phone — useful for the first few checks until you know your numbers by heart.
Which Gauge Should You Buy?
Digital gauges give a precise numeric readout and are the least prone to user error, making them the best pick for most drivers. Dial gauges are nearly as accurate and tend to survive being tossed around in a glovebox better than digital ones. Pencil-style gauges are the cheapest and most compact, but the sliding scale is easier to misread, especially in low light — fine as a backup, not ideal as your only gauge.
Step 1: Find Your Recommended PSI
Before touching a single valve stem, you need to know the target number. This trips up more people than the actual measuring step, because there are two different numbers printed on or near your tires, and only one of them is correct.
Where the Correct Number Lives
- Driver’s door jamb sticker: Open the driver’s door and look at the sticker on the door frame itself (not the door). It lists the recommended cold tire pressure for the front and rear tires, often as two separate numbers.
- Owner’s manual: The same figures are listed in the manual, usually in the “Tires and Wheels” or “Specifications” section.
- Fuel filler door: A small number of vehicles print the PSI recommendation inside the fuel door instead of the door jamb.
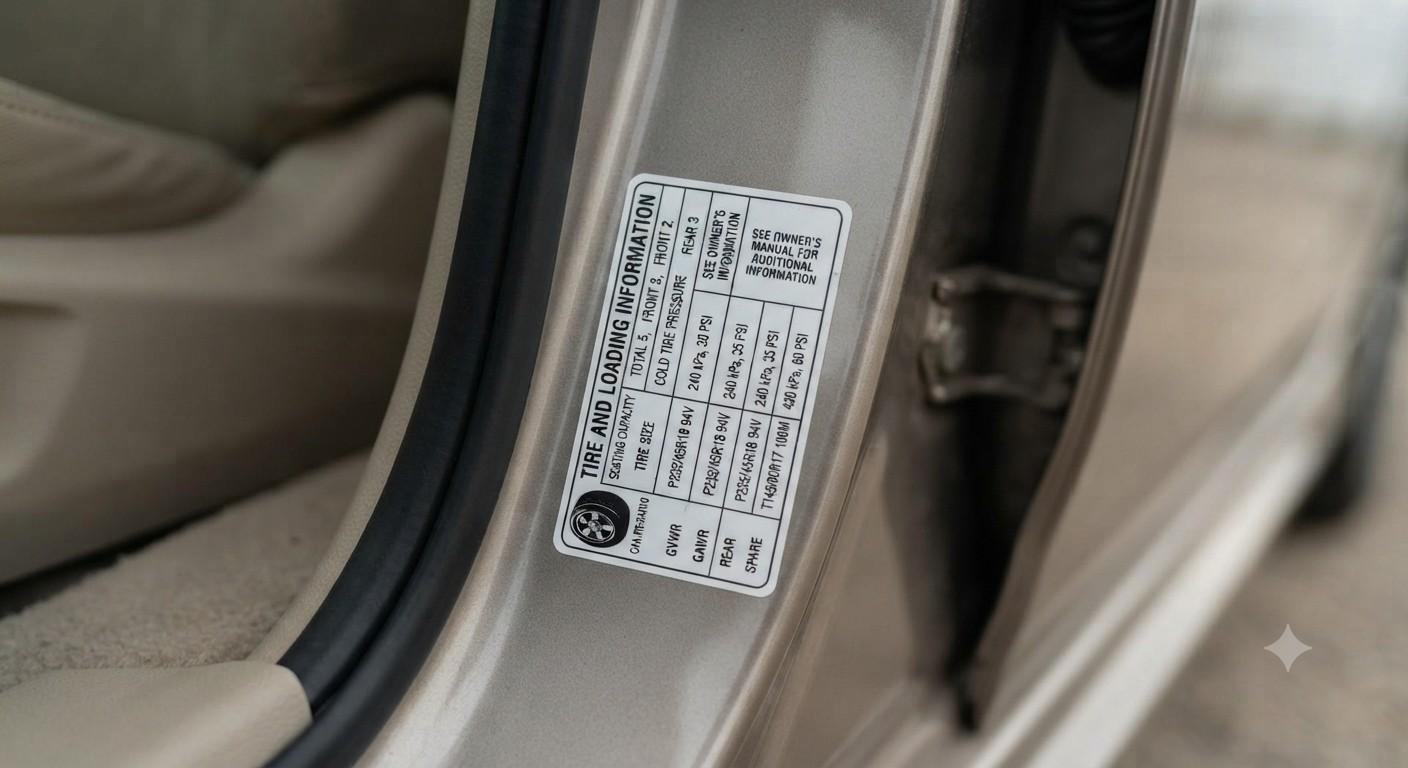
Most passenger cars call for somewhere between 30 and 35 PSI, though this varies by vehicle weight, tire size, and load. Trucks and SUVs carrying heavier loads may specify different pressures for front versus rear tires, or a separate “loaded” pressure for towing.
Step-by-Step: How to Check Tire Pressure
Here is the complete process, step by step. This takes about 2–3 minutes per tire the first time, and well under a minute once it becomes routine.
Find your target PSI
Check the driver’s door jamb sticker or owner’s manual for the cold tire pressure recommendation before you start.
Make sure the tires are cold
Check first thing in the morning, or after the car has sat for at least three hours. Driving heats the air inside the tire and skews the reading.
Remove the valve cap
Unscrew the small plastic or metal cap on the tire’s valve stem. Set it somewhere you won’t lose it — a cup holder or pocket works fine.
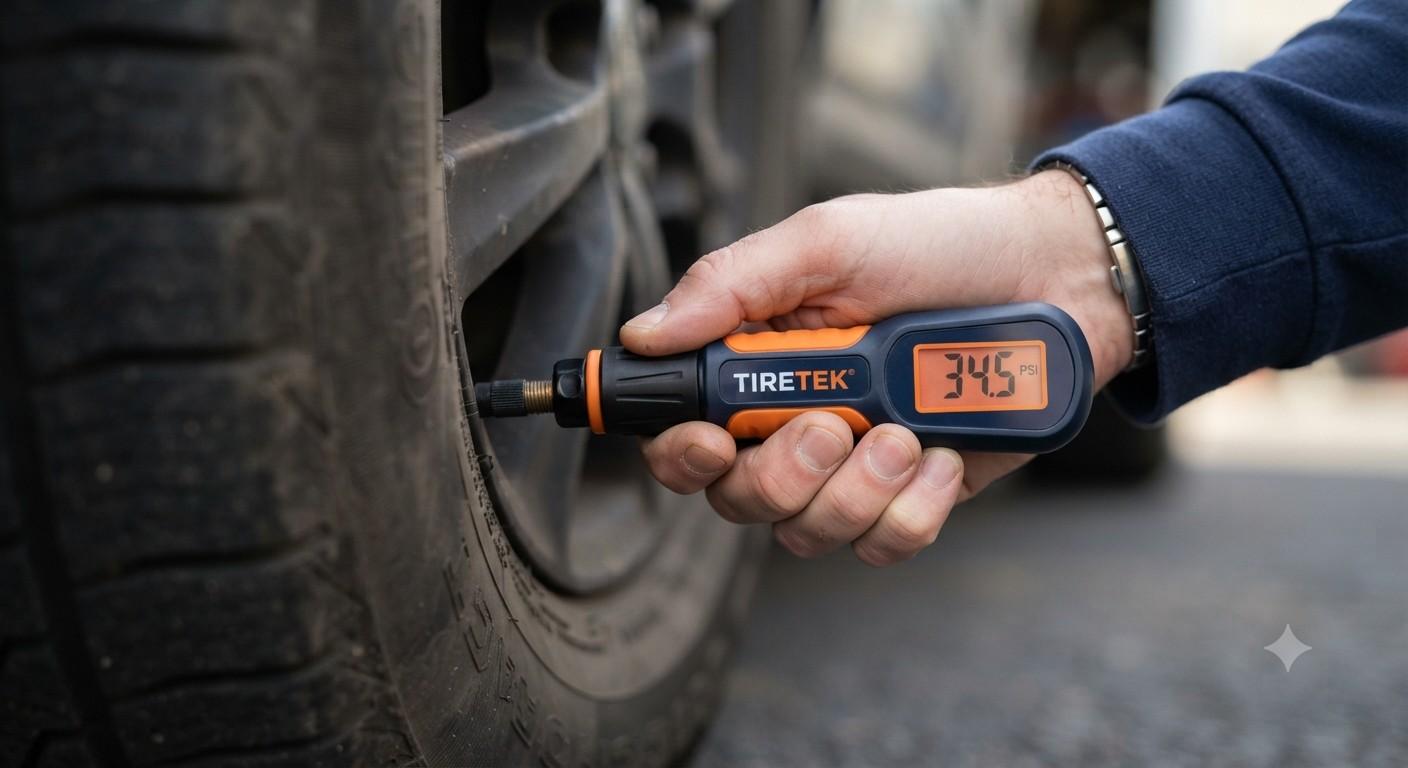
Press the gauge onto the stem
Push the gauge straight onto the valve stem firmly and evenly. You’ll hear a short hiss of escaping air followed by silence once the seal is good.
Read the number
On a digital gauge, read the screen. On a dial gauge, read the needle. On a pencil gauge, read where the sliding scale stops.
Compare to your target PSI
If the reading matches the door-jamb number, replace the cap and move to the next tire. If it’s off, adjust as described below.
Add or release air as needed
Use an air compressor to add air in short bursts, rechecking often. Most gauges have a small pin on the back you can press to release air if a tire is overinflated.
Replace the valve cap and repeat
Screw the cap back on to keep dirt and moisture out, then repeat the process for the remaining three tires and, if you have one, the spare.
When to Check: Cold vs. Hot Tires
“Cold” doesn’t mean cold weather — it means the tire’s temperature hasn’t been raised by friction from driving. Even a short five-minute drive can raise the internal air pressure by several PSI, which will show an inflated number even if the tire is actually underinflated at rest.
- Best time to check: First thing in the morning, before the car has moved.
- If you’ve already driven: Wait at least three hours after the vehicle has been parked, or drive less than a mile at low speed before checking.
- At a gas station: If your tires have been driven on for more than a couple of miles to get there, add roughly 4 PSI above your target as a rough estimate for a “hot” reading, then re-check when the tires are cold again to fine-tune. This is only an approximation — a true cold reading is always more accurate.
How Often You Should Check Tire Pressure
Tires lose air naturally over time, even with no puncture or leak — air molecules slowly permeate through the rubber. On average, tires lose around 1 to 2 PSI per month, and cold weather can drop pressure further, since air contracts as temperatures fall (roughly 1 PSI per 10°F drop).
- Monthly: The general rule most tire manufacturers and safety agencies recommend — check once a month, no exceptions.
- Before long trips: Always check before a road trip, especially one involving highway speeds or heavy luggage.
- With every season change: The first cold snap of fall and the first heat wave of summer are common triggers for pressure drifting outside the ideal range.
- Any time the TPMS light comes on: Treat the dashboard warning light as an immediate prompt to check, not something to put off.
How to Check Tire Pressure Without a Gauge
A gauge is always the accurate way to check tire pressure — nothing else gives you an actual PSI number. But if you’re in a situation without one, there are a few rough ways to spot a problem tire until you can get a proper reading.
Visual Inspection
Walk around the vehicle and look at each tire from a few feet back, ideally on level ground. A significantly underinflated tire will show visible bulging at the sidewall, and the tire may look slightly flatter at the bottom compared to the others.
The Hand-Press Test
Press firmly on the tread with the flat of your palm. A properly inflated tire will feel firm with very little give. A soft or spongy feel under the same amount of pressure across tires is a signal that one or more may be low — though this method is subjective and easy to get wrong, especially on larger truck tires.
Watch the TPMS Warning Light
Most vehicles built after 2008 in the U.S. are required to have a Tire Pressure Monitoring System, which triggers a dashboard warning icon (a horseshoe-shaped symbol with an exclamation point) when a tire drops significantly below the recommended pressure. This isn’t a substitute for regular checks, since TPMS typically only alerts once pressure is already meaningfully low, but it’s a useful backup.
How to Check Tire Pressure at a Gas Station
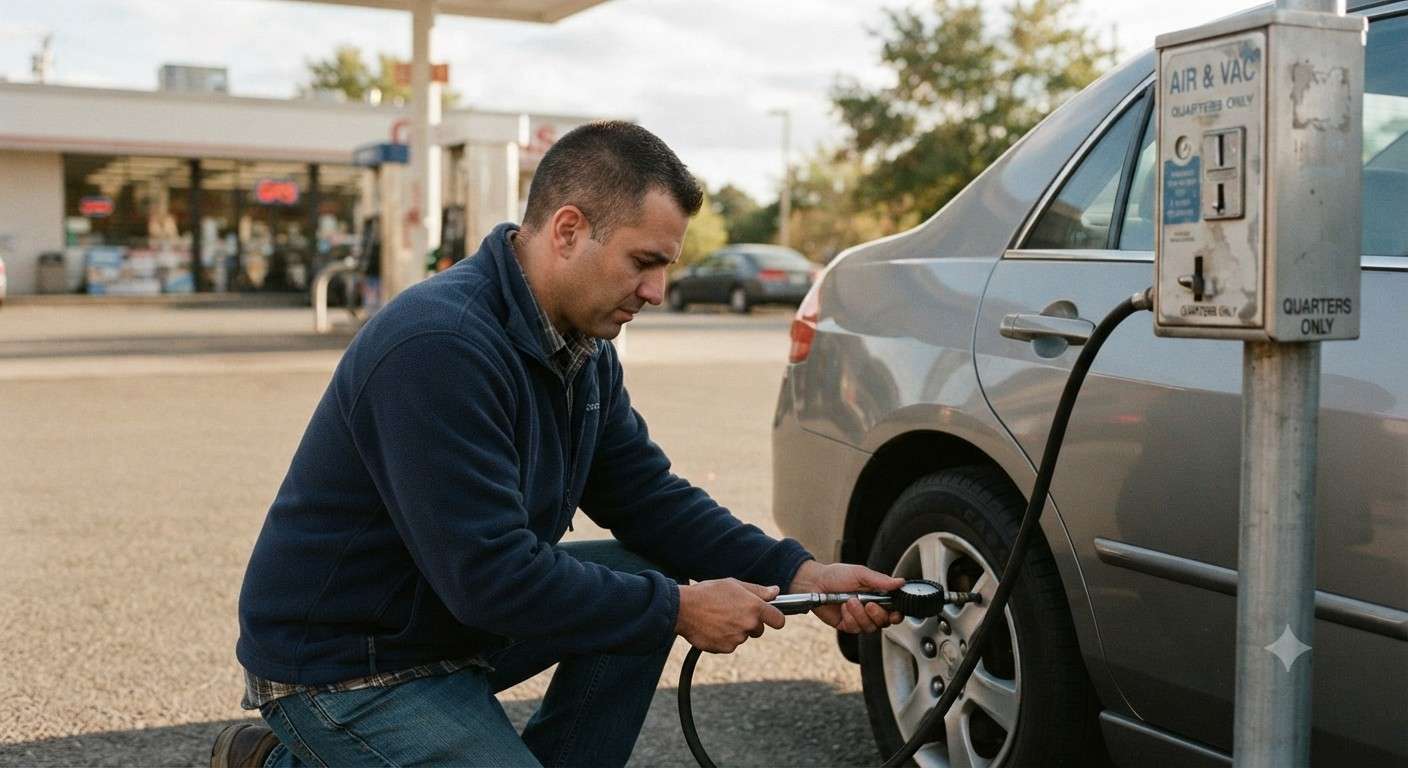
Most gas stations have a coin- or card-operated air pump with a built-in pressure gauge, making it a convenient option if you don’t own a gauge at home.
- Pull up next to the air pump so the hose can reach all four tires.
- Insert payment if required, and select your target PSI on the pump if it has a digital display (many newer units let you set a target and will beep when it’s reached).
- Remove the valve cap and press the pump’s nozzle onto the valve stem the same way you would a handheld gauge.
- Read the pressure on the pump’s built-in gauge, or use your own portable gauge for a more reliable reading — gas station pump gauges are notoriously inconsistent and can be off by several PSI.
- Add air in short bursts if the tire is low, checking frequently so you don’t overinflate.
- Replace the valve cap and move to the next tire.
Checking Pressure via Your Dashboard (TPMS)
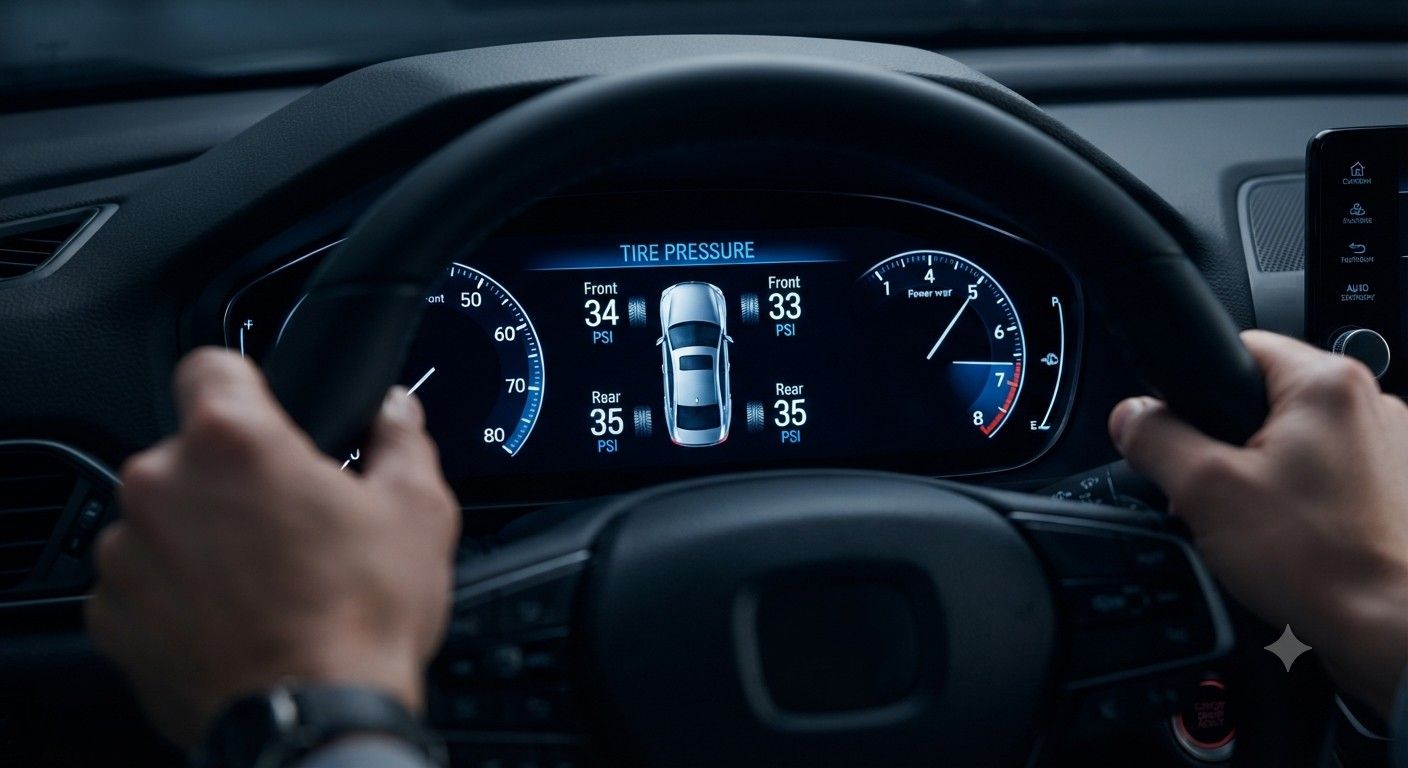
Many modern vehicles let you view live tire pressure readings directly from the driver’s display or an in-dash infotainment menu, without ever touching a physical gauge. This is powered by the Tire Pressure Monitoring System (TPMS) — small sensors mounted inside each wheel that transmit real-time pressure data to the car’s computer.
General Steps (Most Vehicles)
- Start the vehicle and let the dashboard fully power on.
- Locate the settings or vehicle info menu, usually accessed with steering-wheel arrow buttons or a touchscreen.
- Navigate to “Vehicle Info,” “Tire Pressure,” or a similar submenu.
- The display will show a live PSI reading for each of the four tires, usually laid out like a simple diagram of the car from above.
The exact menu path differs by manufacturer and even by model year, which is why the reference table below breaks out steps for the most commonly searched vehicles.
Car-by-Car Dashboard Reference Table
Below is a quick reference for checking tire pressure via the dashboard on some of the most popular vehicles. Menu wording can vary slightly by trim and model year, so if a step doesn’t match exactly, look for the closest equivalent menu name.
| Vehicle | How to View Tire Pressure on the Dashboard |
|---|---|
| Honda Civic / Accord / CR-V | Use the steering wheel arrow buttons to cycle the driver information display to “Tire Pressure,” which shows all four PSI readings at once. |
| Toyota Camry / Corolla / RAV4 | Press the “Info” or steering-wheel display button to cycle to the tire pressure screen, showing individual readings per tire. |
| Mazda CX-5 / Mazda3 | Use the commander knob to navigate the center display to “Vehicle Settings” or the multi-info display, then select Tire Pressure Monitor. |
| Subaru Outback / Crosstrek / Forester | Cycle the multi-function display using the steering wheel buttons until the tire pressure screen appears, listing all four tires. |
| Audi Q5 / A4 / A3 | Open the MMI menu, go to “Car” or “Vehicle Status,” then select “Tire Pressure” to view live readings. |
| BMW 3 Series / X3 / X5 | Access iDrive, go to “Vehicle Info,” then “Tire Pressure” to view current readings and reset values after inflation. |
| Mercedes-Benz C-Class / GLC | Use the COMAND or MBUX system, navigate to “Vehicle” then “Tire Pressure” to see live PSI per wheel. |
| Hyundai Elantra / Tucson / Santa Fe | Cycle the instrument cluster display using steering wheel buttons to reach the tire pressure page. |
| Kia Telluride / Sportage / Forte | Use the steering wheel menu button to scroll the cluster display to “Tire Pressure Monitoring.” |
| Nissan Altima / Sentra / Rogue | Cycle the driver display with steering wheel arrows to find the TPMS screen showing all four tires. |
| Volkswagen Jetta / Tiguan / Atlas | Go to the Car menu on the infotainment screen, then select Tire Pressure Monitoring to view live values. |
| Ford Escape / Explorer / F-150 | Use the steering wheel menu buttons to reach the “Compass/Info” screen, then scroll to the tire pressure display. |
| Tesla Model 3 / Model Y | Tap the car status icon on the center touchscreen; a live diagram displays all four tire pressures directly. |
Don’t See Your Vehicle Listed?
The universal fallback works on virtually every modern car: use the steering wheel’s left or right arrow buttons to cycle through the driver information display options until you reach a screen labeled “Tire,” “TPMS,” or a small icon of a tire with a gauge. If your vehicle predates 2008 or lacks a digital display, it likely doesn’t have TPMS at all, and a manual gauge check is the only option — which is perfectly fine, since it’s just as accurate.
Resetting the Tire Pressure Light After Inflating
After correcting your tire pressure, the dashboard warning light doesn’t always turn off immediately. In most cases:
- Drive at 15+ mph for about 10 minutes, which lets the TPMS system recalibrate automatically.
- If the light stays on, look for a dedicated “TPMS Reset” button, often located under the steering column or in the glovebox.
- Some vehicles require holding the reset button with the key in the “On” position (engine off) until the light blinks, then starting the car and driving briefly.
- If the light still won’t clear, it may indicate a failing sensor rather than a pressure issue, and is worth having checked by a technician.
How to Check Your Spare Tire
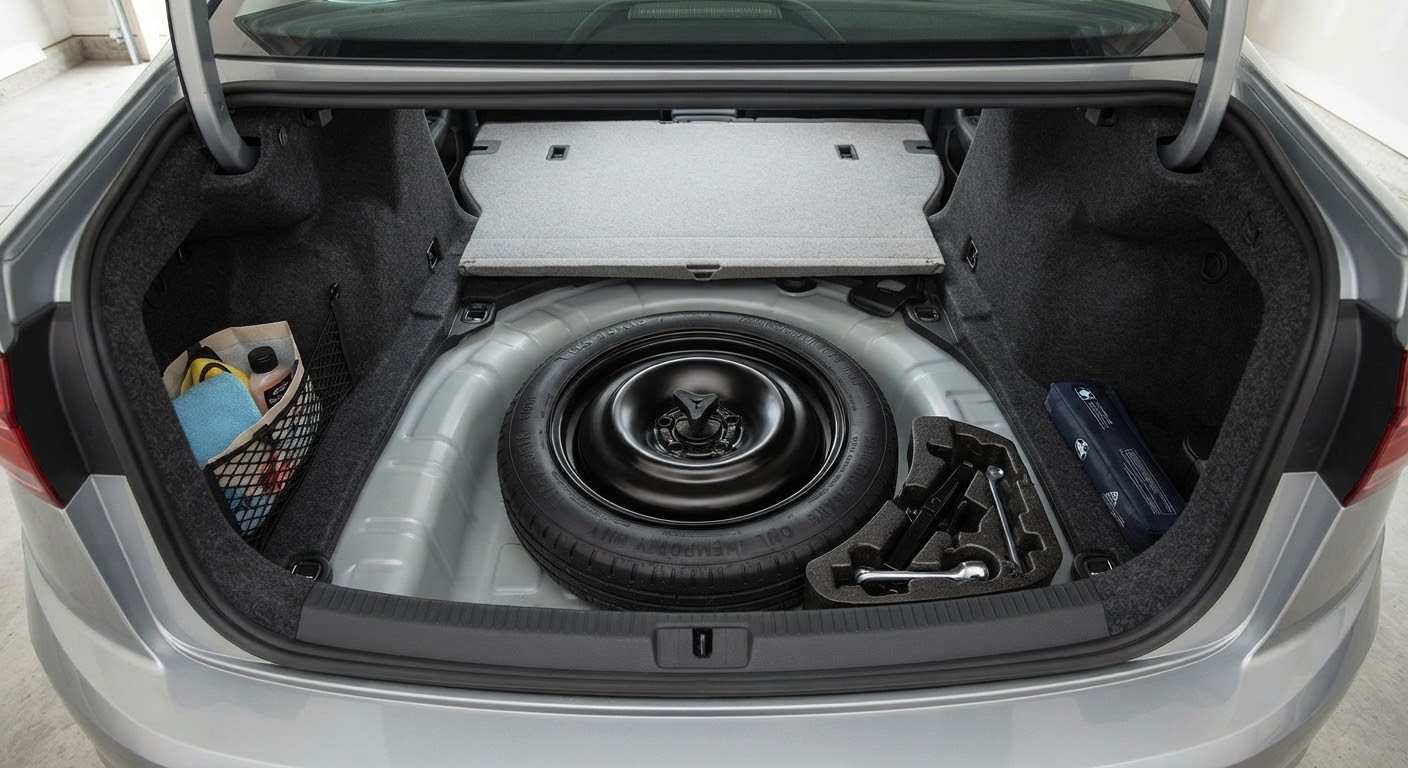
The spare is the tire everyone forgets — until the moment they actually need it, only to find it’s flat. Since a spare typically isn’t driven on, it can slowly lose pressure over months or years without anyone noticing.
- Locate the spare (usually under the trunk floor, mounted underneath the vehicle, or on a rear-mounted bracket for SUVs).
- Check its recommended pressure — full-size spares typically match the vehicle’s standard tire pressure, while compact “donut” spares usually require a much higher PSI, often 60 PSI, which is printed directly on the tire’s sidewall.
- Use the same gauge and process as the main tires.
- Check the spare every few months, since it’s easy to forget compared to the tires you see daily.
Checking Pressure on Motorcycles and Bicycles
Motorcycle Tire Pressure
Motorcycle tires run at different pressures than car tires and are more sensitive to being off-spec, since there’s less rubber in contact with the road and no stability from a second axle track.
- Find the recommended PSI on a sticker on the swingarm, chain guard, or in the owner’s manual — front and rear pressures are usually different.
- Check when the tires are cold, ideally before the bike has been ridden that day.
- Use a compact motorcycle-specific gauge, since standard car gauges can be awkward to fit on some valve stem angles.
- Check weekly rather than monthly — motorcycle tires are more sensitive to small pressure changes affecting handling and grip.
Bicycle Tire Pressure
Bike tires use either a Schrader valve (same as a car) or a Presta valve (thinner, with a small locknut at the tip), and the recommended PSI range is printed directly on the tire’s sidewall — usually a range like “40–65 PSI” rather than a single number.
- For a Presta valve, unscrew the small lock nut at the top before attaching a pump or gauge.
- Road bike tires typically run much higher pressure (80–130 PSI) than mountain bike tires (25–35 PSI), which need lower pressure for traction and shock absorption.
- Check before every ride — bike tires, especially narrow road tires, lose noticeable pressure within just a few days.
Common Mistakes to Avoid
- Using the sidewall max PSI instead of the door-jamb number. This is the single most common error and leads to overinflation.
- Checking right after driving. A “hot” reading looks artificially higher than the tire’s true resting pressure.
- Only checking the tire that looks low. All four tires (and the spare) should be part of every check.
- Trusting the TPMS light as your only monitoring method. It typically only triggers once pressure is already well below target.
- Not replacing the valve cap. Missing caps let in dirt and moisture, which can corrode the valve core over time.
- Ignoring seasonal drops. A tire that was perfect in August can be 4–5 PSI low by the first cold snap in November.
Seasonal Tire Pressure Changes
Air contracts in the cold and expands in the heat, and tire pressure follows right along with outside temperature — roughly a 1 PSI change for every 10°F shift.
- Fall/Winter: Check more frequently as temperatures drop; a tire that reads correctly in September can be several PSI low by December without any leak at all.
- Spring/Summer: Rising temperatures push pressure back up, and long summer highway drives on hot pavement raise it further — check before, not just after, hot-weather road trips.
- Elevation changes: Driving from low to high altitude can also shift readings slightly due to lower ambient air pressure, though this effect is much smaller than temperature swings.
A Simple Monthly Checklist
- Check all four tires, plus the spare, once a month when tires are cold.
- Compare each reading to the door-jamb sticker, not the tire sidewall.
- Top up or release air as needed, rechecking after every adjustment.
- Inspect tread depth and look for uneven wear patterns while you’re already down there.
- Note the date somewhere (a phone reminder works well) so the next check doesn’t get forgotten.
Keep Your Tires in Top Shape
Now that pressure is dialed in, make sure the rest of your setup is right too:
- Use our Tire Size Calculator to confirm your exact tire specifications before your next replacement.
- Compare Tire Brands to find the right fit for your driving style and budget.
- Visit TireNearMeHub.com for more maintenance guides, seasonal tire advice, and shopping tools.
Frequently Asked Questions
How often should I check my tire pressure?
Check your tire pressure at least once a month and before any long road trip. Tires naturally lose about 1 to 2 PSI per month, and pressure drops further when the outside temperature falls, so monthly checks catch slow leaks and seasonal changes before they become a problem.
How do I check tire pressure without a gauge?
Without a gauge, you can only estimate pressure by sight and feel: look for visible bulging at the sidewall, press firmly on the tread with your palm to feel unusual softness, or watch for your vehicle’s TPMS warning light. None of these give an exact PSI number, so treat them as a temporary check until you can use a real gauge at home or at a gas station.
Should I check tire pressure when the tires are hot or cold?
Always check when the tires are cold — meaning the car has been parked for at least three hours or hasn’t been driven more than a mile or two. Driving heats the air inside the tire and temporarily raises the PSI reading, which can hide an underinflated tire or make a correctly inflated one look overinflated.
Where do I find the correct tire pressure for my car?
The correct cold tire pressure is printed on a sticker inside the driver’s side door jamb and is also listed in your owner’s manual. This reflects the vehicle manufacturer’s recommendation and can differ from the maximum pressure molded into the tire’s sidewall, which is not the number you should use.
Why does my tire pressure light stay on after I’ve filled the tires?
After inflating all four tires (and the spare, on some vehicles) to the correct PSI, the TPMS system usually needs a few minutes of driving at 15+ mph to recalibrate and turn the light off. If it stays lit after driving, the vehicle may need a manual TPMS reset through the dashboard menu, or a sensor could need inspection.
Conclusion
Checking tire pressure is one of the smallest habits with an outsized payoff: better fuel economy, longer-lasting tires, a smoother ride, and — most importantly — safer handling and shorter stopping distances. The process itself is simple once the steps are second nature: find the correct cold PSI from the door-jamb sticker, check first thing in the morning or after the car has rested, press the gauge firmly onto the valve stem, and adjust as needed.
Whether it’s done with a $10 digital gauge at home, a pump at the gas station, or a glance at a digital dashboard display, the goal is the same — catching a problem while it’s still a 2-minute fix, not a roadside one. Build it into a monthly routine, check it before every long trip, and pay closer attention as the seasons change, and tire pressure becomes one less thing to worry about on the road.