Roadside Safety Guide • Updated for 2026
How to Change a Flat Tire Step by Step
A complete, beginner-friendly, safety-first walkthrough — from spotting the warning signs to torquing the last lug nut.
A flat tire always seems to happen at the worst possible moment — on the highway, in the rain, or five minutes before an important meeting. The good news? Learning how to change a flat tire step by step is one of the most useful skills any driver can have, and it takes most people under 20 minutes once they know the process.
According to the U.S. Department of Transportation’s Bureau of Transportation Statistics, tire-related issues contribute to tens of thousands of roadside breakdowns every year, and AAA estimates it responds to over 4 million tire-related service calls annually. Knowing how to handle a flat yourself means you’re never stuck waiting hours for roadside assistance in an unsafe spot.
This guide walks through every stage of the process — safety prep, tools, the actual tire swap, and what to do afterward — written in plain language so even a first-time driver can follow along confidently.

Signs You Have a Flat Tire
Before jumping into the fix, it helps to confirm what’s actually happening. Common warning signs include:
- A pulling sensation to one side while driving
- A thumping or slapping noise from one wheel
- A dashboard Tire Pressure Monitoring System (TPMS) warning light
- Visible sagging or a wheel sitting noticeably lower than the others
- Vibration through the steering wheel at low speed
If your dashboard light keeps coming back even after inflating, it’s worth reading our guide on a low tire pressure light that won’t turn off — it could mean a slow leak rather than a sudden flat.
Tools You’ll Need
Most vehicles come with everything needed for a basic tire change, but it’s smart to double-check your trunk before you actually need it.
| Tool | Purpose |
|---|---|
| Spare tire (or full-size spare) | Replaces the flat tire |
| Car jack | Lifts the vehicle off the ground |
| Lug wrench | Loosens and tightens lug nuts |
| Wheel wedges/chocks | Prevents the car from rolling |
| Vehicle owner’s manual | Shows correct jack points |
| Flashlight, gloves, reflective triangle | Visibility and safety, especially at night |
A reliable tire pressure gauge and a portable inflator, like the ones reviewed in our Ryobi tire inflator review, are also worth keeping in the trunk for minor leaks that don’t require a full swap.
Safety First: Before You Start
Changing a tire on the side of a road carries real risk — the National Highway Traffic Safety Administration reports hundreds of roadside deaths each year involving disabled vehicles. Take a few precautions before touching a single tool:
- Pull as far off the road as possible, ideally onto a flat, stable surface
- Turn on your hazard lights immediately
- Apply the parking brake
- Place wheel wedges in front of and behind the tire diagonal to the flat
- Keep passengers and pets out of the vehicle and away from traffic
- If you’re on a busy highway with no safe shoulder, call for roadside assistance instead of changing it yourself
How to Change a Flat Tire: Step-by-Step
Step 1: Find a Safe, Flat Spot
Look for a parking lot, wide shoulder, or driveway. Avoid soft ground, inclines, or curves where visibility is poor.
Step 2: Turn on Hazards and Secure the Car
Engage the parking brake and place wheel wedges to stop any rolling.
Step 3: Remove the Hubcap and Loosen the Lug Nuts
If your wheel has a hubcap or wheel cover, pry it off first. Using the lug wrench, turn each lug nut counterclockwise about a quarter turn — just enough to break the resistance. Don’t remove them fully yet; it’s much easier to loosen them while the tire is still on the ground and can’t spin.
Step 4: Position the Jack and Lift the Vehicle
Check your owner’s manual for the correct jack point — usually a reinforced frame section near the flat tire. Raise the car until the flat tire is about 6 inches off the ground.
Step 5: Remove the Lug Nuts and the Flat Tire
Finish unscrewing the lug nuts by hand and set them aside somewhere they won’t roll away. Pull the flat tire straight toward you off the wheel hub.
Step 6: Mount the Spare Tire
Line up the spare’s rim with the wheel bolts and push it onto the hub. Hand-thread each lug nut back on in a star pattern — this seats the wheel evenly.
Step 7: Lower the Car and Tighten the Lug Nuts
Lower the vehicle until the spare touches the ground but doesn’t take full weight yet. Fully tighten the lug nuts in a star pattern using the lug wrench, then lower the car the rest of the way.
Step 8: Do a Final Torque Check
With the car fully on the ground, give each lug nut one more firm tighten. If you have a torque wrench, tighten to your manufacturer’s spec (commonly 80–100 ft-lbs for most passenger vehicles).

Watch: How to Change a Flat Tire (Quick Video Walkthrough)
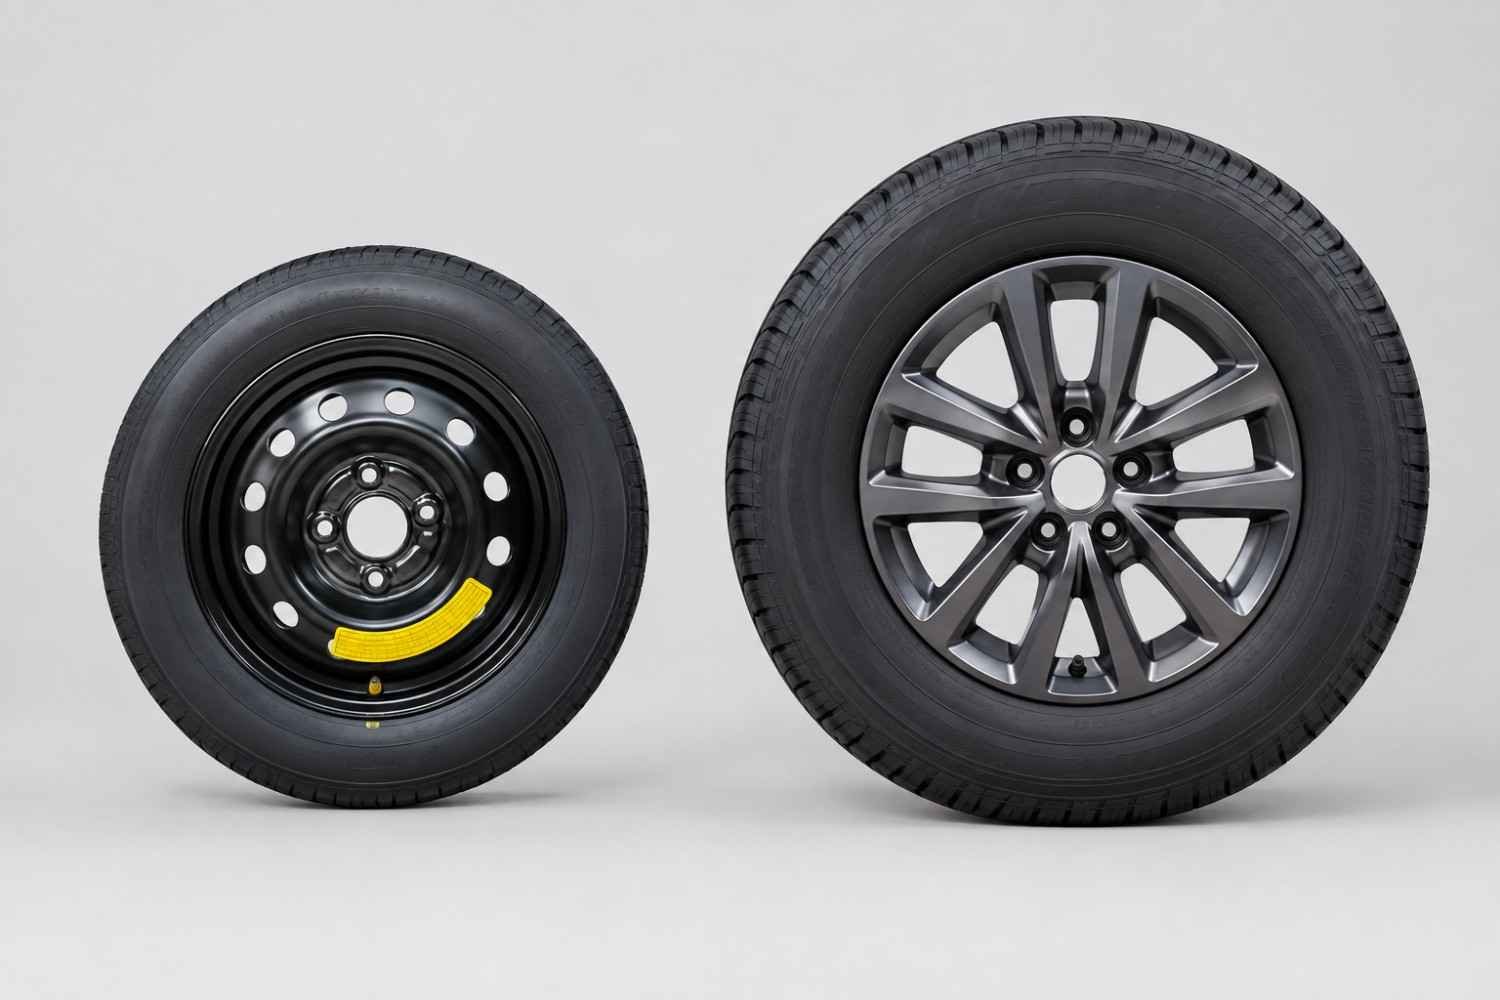
Spare Tire Types Compared
| Spare Type | Max Speed | Best For |
|---|---|---|
| Compact “donut” spare | ~50 mph | Short-term emergency use |
| Full-size matching spare | Normal driving speeds | Longer trips, trucks, SUVs |
| Run-flat tire (no spare) | ~50 mph for ~50 miles | Vehicles without a spare at all |
Not sure which type your vehicle uses? Our guide to run-flat tires explains how they work and when you’d still need professional repair.
Common Mistakes to Avoid
- Loosening lug nuts after jacking up the car — the wheel will just spin freely
- Using the wrong jack point — can dent the frame or cause the jack to slip
- Skipping wheel wedges — the car can roll while you’re underneath it
- Not tightening lug nuts in a star pattern — leads to an unevenly seated wheel
- Driving too far or too fast on a donut spare — risks damaging the spare or the drivetrain
What to Do After You Change the Tire
Once you’re safely back on the road, don’t forget the flat tire itself. Depending on the damage, it may be repairable or it may need replacing.
- Check your tread depth to see if the tire was already near the end of its life
- Compare the cost of a tire plug vs. patch for small punctures
- Get a quote for a flat tire repair before assuming you need a full replacement
- Have your alignment checked — our wheel alignment guide explains when it’s necessary after a flat
- Replace the spare with a proper tire as soon as possible
If you’d rather have a professional handle it, you can browse local tire services or search by state to find a nearby shop.
Frequently Asked Questions
Most drivers can change a flat tire in 15–30 minutes once they’ve had some practice with the process.
Not safely. A jack is required to lift the wheel off the ground so it can be removed and replaced.
Compact donut spares are typically rated for a maximum of 50 mph and should only be used for short distances.
Only if the shoulder is wide and stable. On narrow or busy shoulders, it’s safer to call roadside assistance.
Most passenger vehicles require 80–100 ft-lbs, but always check your owner’s manual for the exact specification.
Conclusion
Knowing how to change a flat tire step by step turns a stressful roadside emergency into a manageable 20-minute task. By staying safe, using the right tools, and following the process — loosen, lift, remove, mount, tighten — any driver can handle a flat with confidence. Once you’re back on the road, don’t forget to get the damaged tire inspected or repaired so your spare doesn’t become a long-term fix.
Looking for more roadside and maintenance guides? Visit the TireNearMeHub blog, explore tires by brand, or if you run a tire shop, get listed through our business submission page.