How to Change a Tire: The Complete Step-by-Step Guide
A clear, expert-reviewed walkthrough for changing a flat tire safely — with or without a jack, on cars, trucks, trailers, and more.

Nearly one in three vehicles in the U.S. deals with a flat tire every year, and roadside services like AAA field more than 4 million flat-tire calls annually. Yet surveys show that a large share of drivers still aren’t confident they could change a tire on their own if it happened right now, on the side of a road.
This guide fixes that. Below is a complete, step-by-step walkthrough for how to change a tire — written so a first-time driver and a seasoned mechanic can both follow it without confusion. It covers the standard method with a jack, what to do if you don’t have one, and how the process shifts for trucks, trailers, lawn mowers, and even bicycles.
Table of Contents
- Why Knowing How to Change a Tire Matters
- Tools and Supplies You Need Before You Start
- How to Change a Tire Step by Step
- How to Change a Tire Without a Jack
- How to Change a Tire on a Rim
- Changing a Tire on Different Vehicles
- Tire Pressure Sensor and Valve Stem Basics
- Common Mistakes to Avoid
- When to Call a Professional Instead
- Frequently Asked Questions
- Conclusion
1. Why Knowing How to Change a Tire Matters
A flat tire rarely happens at a convenient time or place. According to industry data, tire punctures occur at a rate of several every second across the United States, and AAA alone responds to well over 4 million flat-tire assistance calls each year. Roadside assistance data also shows that tire-related breakdowns are among the top three reasons drivers call for help, alongside dead batteries and lockouts.
Knowing how to change a tire yourself gives real, practical benefits:
- Faster resolution — you’re not stuck waiting 30–60 minutes for a tow truck on the shoulder of a highway.
- Lower cost — a self-change costs nothing beyond the tools you already carry, versus a service call fee.
- Safety — the less time spent parked on a roadside, especially at night or on a highway, the lower the risk.
2. Tools and Supplies You Need Before You Start
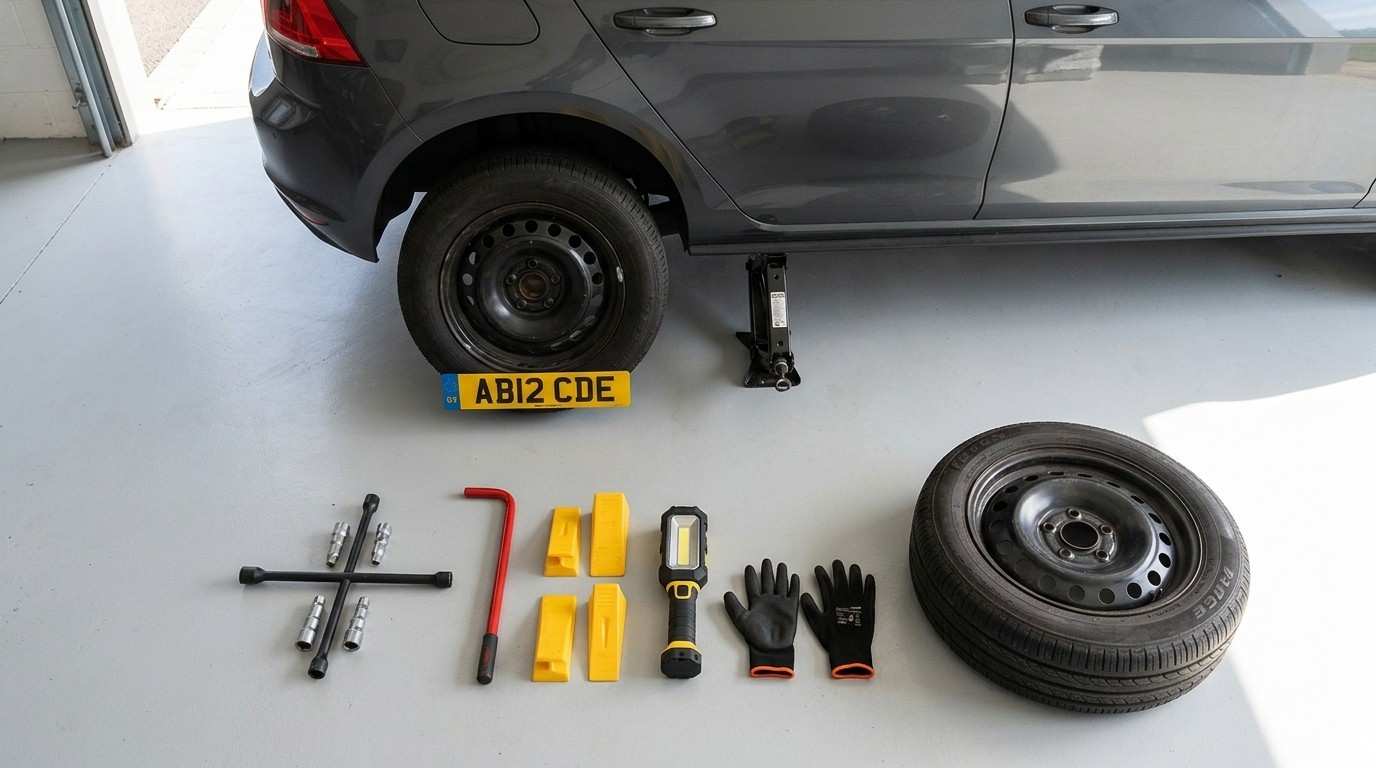
Before touching a lug nut, gather everything in one place. Most of these tools already live in a factory tire-change kit under the trunk floor or truck bed.
Essential Tools Checklist
| Tool | Purpose | Usually Found |
|---|---|---|
| Spare tire | Replacement for the flat | Trunk well or underbody cradle |
| Car jack | Lifts the vehicle off the ground | Trunk, alongside the spare |
| Lug wrench | Loosens and tightens lug nuts | Trunk tool kit |
| Wheel wedges/blocks | Prevents the car from rolling | Bring your own if not included |
| Owner’s manual | Shows jack points and torque specs | Glovebox |
| Flashlight | Visibility at night | Glovebox or trunk |
| Gloves | Grip and hand protection | Optional, but recommended |
| Reflective triangle/flares | Warns other drivers | Optional safety add-on |
3. How to Change a Tire Step by Step
This is the core process most cars, sedans, and light SUVs follow. Read it once before your first real tire change so nothing catches you off guard.
1 Find a Safe, Flat Location
As soon as you notice a flat, slow down gradually and look for a flat, stable surface — a parking lot, a wide shoulder, or a straight section of road away from a curve. Avoid soft ground, inclines, and areas close to fast-moving traffic when possible.
2 Turn on Hazards and Secure the Vehicle
Turn on your hazard lights immediately. Put the car in Park (or first gear/Reverse for manual transmissions) and apply the parking brake. Place wheel wedges behind the tires opposite the flat to stop any rolling.

3 Loosen the Lug Nuts — Before Jacking
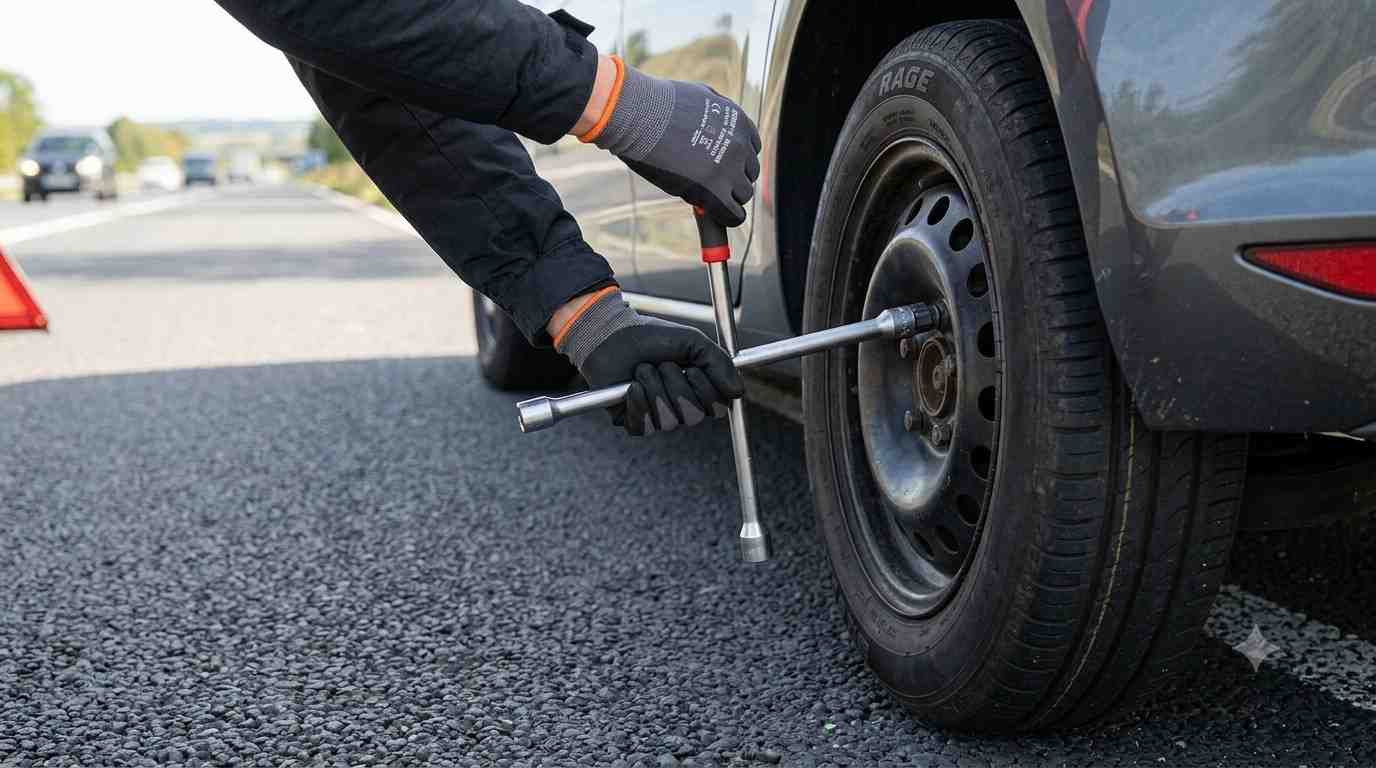
With the car still on the ground, use the lug wrench to turn each lug nut counterclockwise about a quarter to half turn. Don’t remove them yet — you’re just breaking the initial resistance while the tire’s weight keeps the wheel from spinning.
4 Position and Raise the Jack
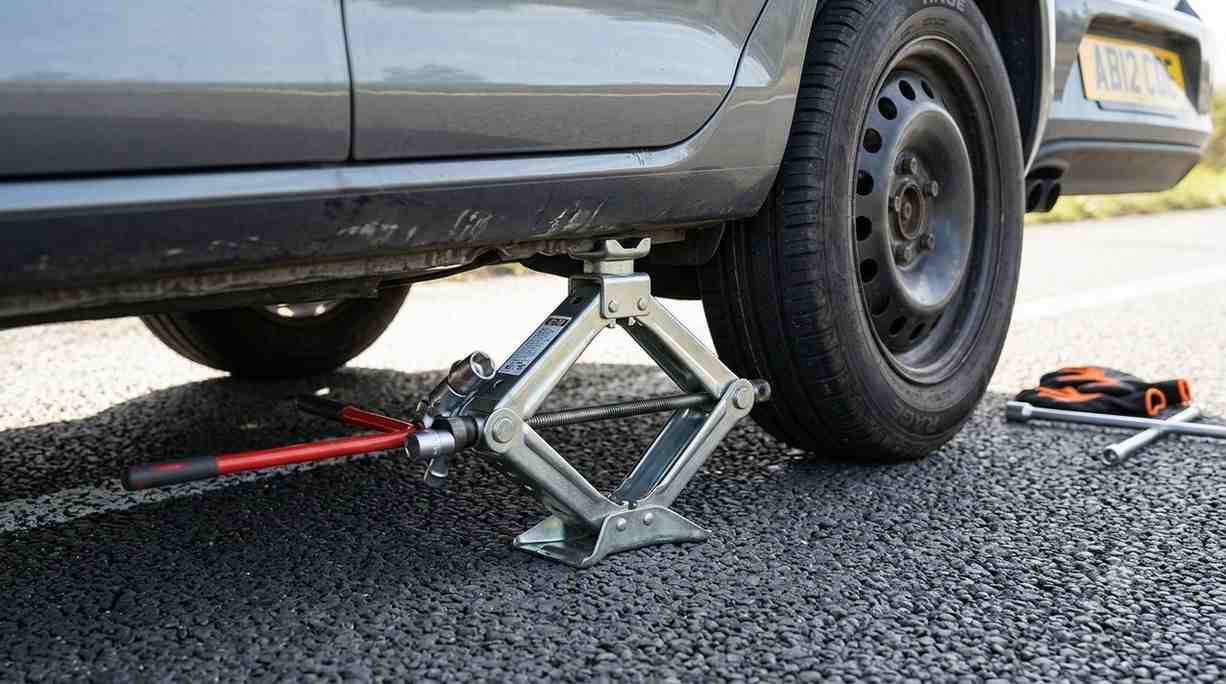
Check the owner’s manual for the correct jack point — usually a reinforced spot along the vehicle’s frame near the flat tire. Raise the vehicle until the flat tire sits a few inches off the ground.
5 Remove the Lug Nuts and the Flat Tire
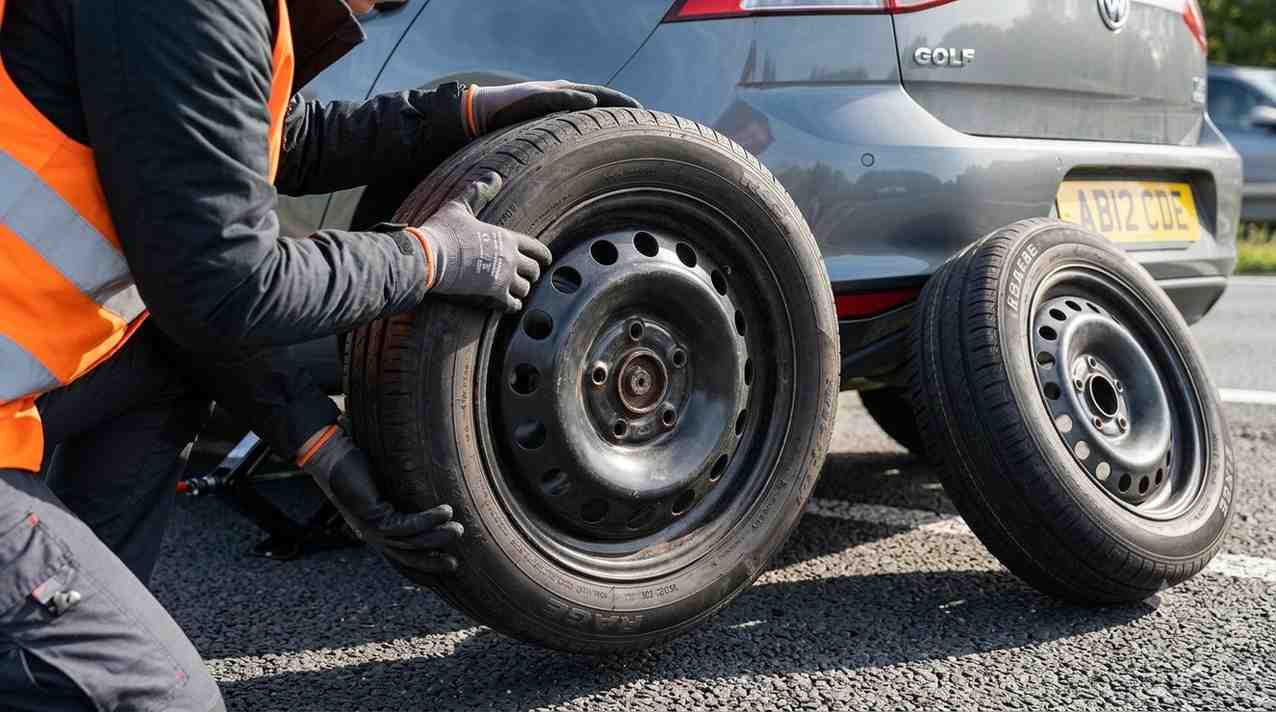
Finish unscrewing the lug nuts by hand and set them aside somewhere they won’t roll away. Grip the tire on both sides and pull it straight toward you off the wheel hub.
6 Mount the Spare Tire
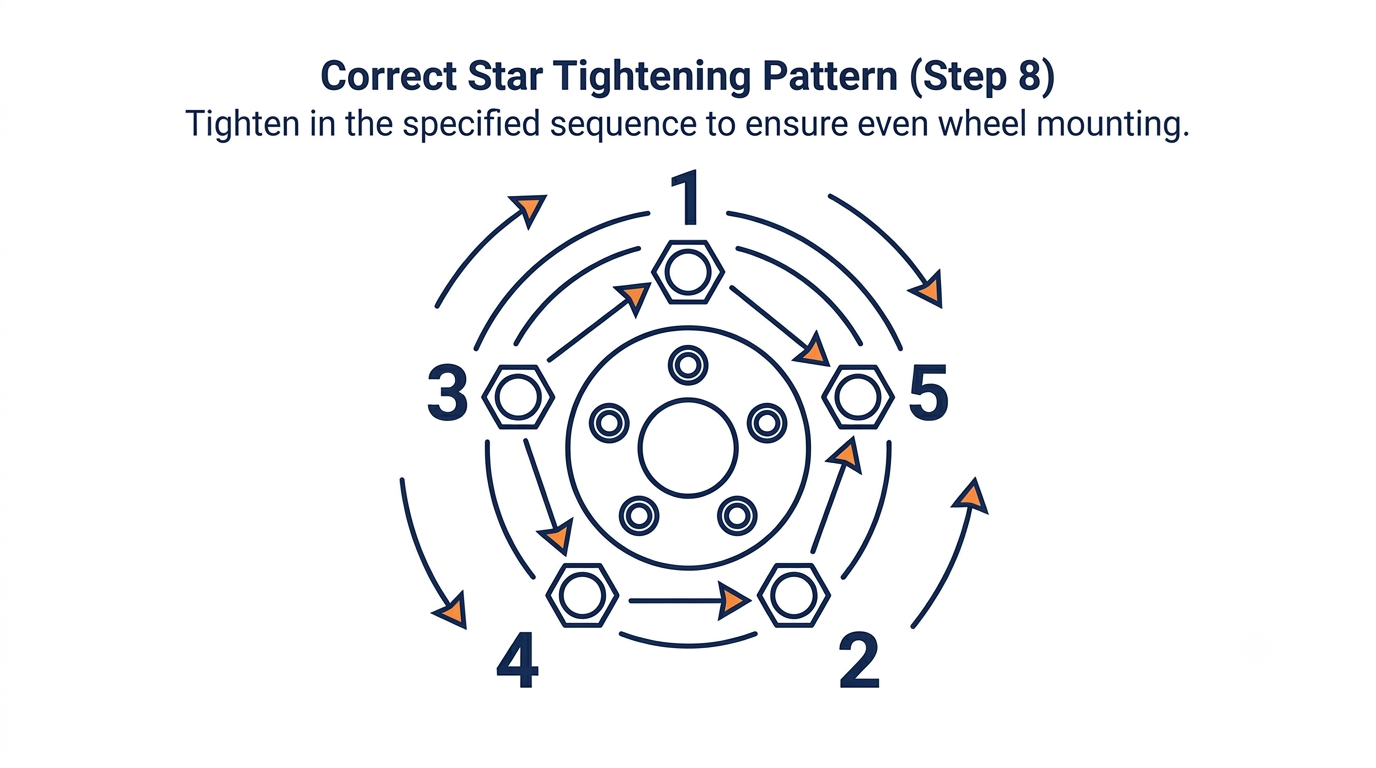
Line up the spare’s holes with the wheel bolts and push it onto the hub. Thread each lug nut back on by hand, tightening in a star pattern (not in a circle) so pressure spreads evenly.
7 Lower the Car and Remove the Jack
Once the lug nuts are snug by hand, lower the vehicle until the spare touches the ground but the full weight isn’t on it yet, then finish removing the jack.
8 Fully Tighten the Lug Nuts
With the car back on the ground, use your full body weight through the lug wrench to tighten each nut firmly, again working in the star pattern. If you have a torque wrench, tighten to the spec listed in your manual.
9 Check Tire Pressure and Drive Carefully
Most spares are compact “donut” tires rated for lower speeds and shorter distances. Check the pressure against the sidewall rating and drive to a tire shop rather than continuing a long trip.
4. How to Change a Tire Without a Jack
If a jack isn’t available, there are still a few workable options, though none are as clean as the standard method:
- Use a scissor jack from another vehicle or a borrowed bottle jack — the most reliable substitute.
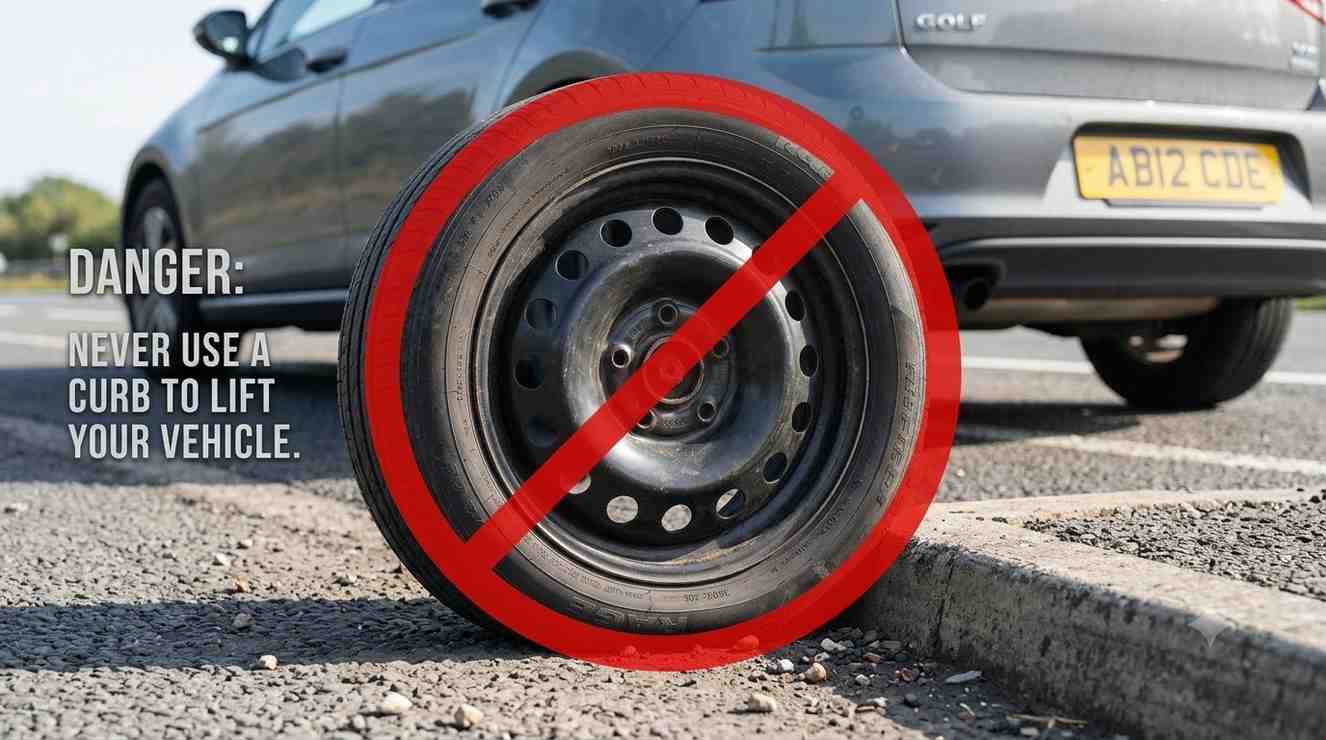
- Drive onto a curb or raised ramp slowly and carefully to lift the flat side just enough to slide the spare underneath, then reverse off — this is a last-resort method and should be done at a crawl.
- Call roadside assistance — if no lifting tool is available at all, this is genuinely the safer route rather than improvising something risky.
5. How to Change a Tire on a Rim
Sometimes the issue isn’t the tire itself but a damaged or bent rim, or you need to swap a tire onto a spare rim. The process largely mirrors the standard steps above, with two extra checks:
- Inspect the rim for cracks or heavy bending before mounting a new tire on it — a compromised rim won’t hold air evenly and can be unsafe at speed.
- Match bolt pattern and center bore — a spare rim must match your vehicle’s lug pattern exactly, or the wheel won’t seat properly.
If the rim itself is bent, driving on it — even with a good tire — can cause a slow leak or vibration. In that case, a shop visit for a rim inspection is worth the trip.
6. Changing a Tire on Different Vehicle Types

Cars, Sedans, and Small SUVs (including Honda Civic-type vehicles)
These follow the standard 9-step process almost exactly. Jack points are usually clearly marked along the rocker panel — check the owner’s manual diagram if unsure.
Trucks and Larger SUVs
Trucks often use heavier wheels and may have the spare mounted underneath the bed on a winch mechanism. The lowering crank is usually accessed through a small port near the license plate or tailgate. Because truck tires are heavier, use both hands and keep your back straight when pulling the wheel free.
Riding Lawn Mowers
For a riding mower, the general idea is the same but on a smaller scale: block the mower securely, use a small hydraulic or bottle jack under the frame (never the deck), remove the retaining clip or nut, slide the wheel off the axle, and reverse the process with the replacement tire.
Bicycles
A bike tire swap is different — no jack needed. Release the brake caliper, remove the wheel by opening the quick-release lever or axle nuts, use tire levers to peel the old tire and tube off the rim, fit the new tube and tire, inflate gradually while checking the tube seats evenly, then reinstall the wheel.
Travel Trailers
Trailer tires need extra care because there’s no engine weight to help stabilize the frame. Use wheel chocks on the tires that stay on the ground, a jack rated for the trailer’s weight, and always check that the trailer is unhitched from strain or on level ground before lifting.
7. Tire Pressure Sensor and Valve Stem Basics
How to Change a Tire Pressure Sensor (TPMS)
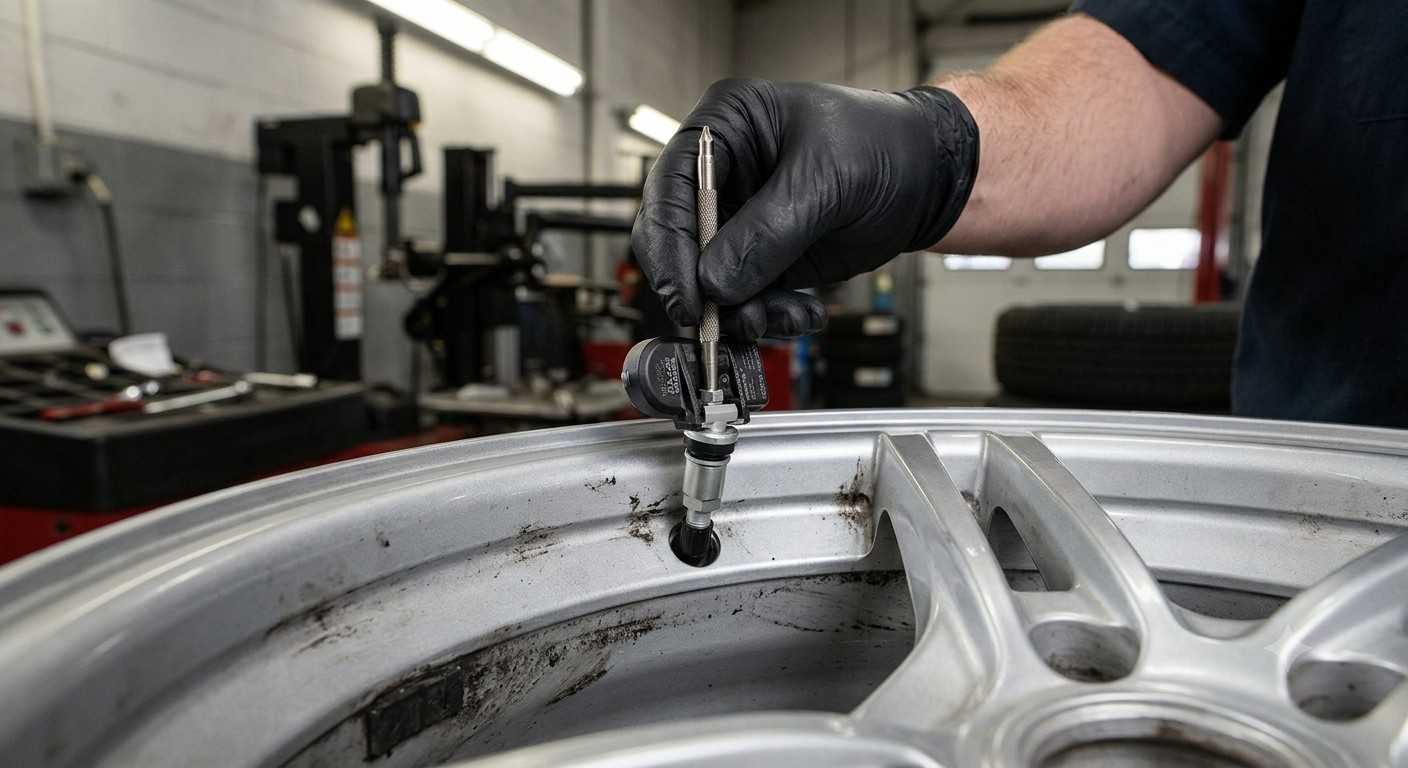
A TPMS sensor sits inside the wheel, attached to the valve stem. Replacing one typically requires removing the tire from the rim entirely — most drivers have this done at a tire shop, since it involves a tire-changing machine and, on many vehicles, a relearn procedure using a scan tool afterward.
How to Change a Tire Valve Stem
A valve stem swap also usually happens with the tire off the rim. A technician removes the old stem, fits a new rubber or metal valve, and reseats the tire with a bead sealer if needed. This is a quick, low-cost job at most tire shops.
8. Common Mistakes to Avoid When Changing a Tire
| Mistake | Why It’s a Problem | Better Approach |
|---|---|---|
| Jacking on soft or sloped ground | Jack can slip or sink | Move to flat, firm ground first |
| Loosening lug nuts after lifting | Wheel spins freely, hard to loosen | Loosen nuts before raising the jack |
| Tightening nuts in a circular pattern | Uneven pressure, can warp the rotor | Use a star/cross pattern |
| Skipping the torque check | Loose wheel risk over time | Re-torque after driving 50 miles |
| Driving far on a compact spare | Spares aren’t built for long distances | Head straight to a tire shop |
9. When to Call a Professional Instead
Changing a tire yourself is a valuable skill, but it isn’t always the right call. Consider professional roadside help or a tow when:
- The flat happened on a busy highway shoulder with no safe pull-off area.
- The lug nuts are locked and the key is missing.
- The spare is also flat or missing.
- Visibility is poor — heavy rain, fog, or nighttime on an unlit road.
- The rim, suspension, or brake line looks damaged.
In these cases, looking up local help through a resource like tire and roadside services near you is often the safer and faster option.
Need Tire Help Near You?
Find trusted local tire shops, roadside assistance, and services in your state.
Browse Services by State10. Frequently Asked Questions
How long does it take to change a tire?
Most drivers can change a tire in 15 to 30 minutes once they’ve done it a few times. First-timers should budget closer to 30–45 minutes to work through each step carefully.
Can I drive on a spare tire long-term?
No. Compact spares are designed for short distances at reduced speeds — typically under 50 miles at speeds below 50 mph — until the original tire is repaired or replaced.
What if I don’t have a spare tire at all?
Many newer vehicles skip the spare in favor of a tire repair kit or run-flat tires. If neither applies to your situation, roadside assistance or a tow to the nearest shop is the safest next step.
Is it safe to change a tire on the highway shoulder?
It can be risky. If possible, drive slowly to an exit, parking lot, or wider shoulder area before stopping. If you must stop on a highway, stay as far from traffic as possible and consider calling for help instead.
Do I need a torque wrench to change a tire?
It’s not strictly required, but it helps ensure lug nuts are tightened to the manufacturer’s exact specification, reducing the risk of a wheel loosening over time. Many drivers hand-tighten with a lug wrench and then get it checked at a shop soon after.
Conclusion
A flat tire is one of the most common roadside problems drivers face, but it doesn’t have to turn into a stressful ordeal. By keeping the right tools in the car, following the steps in order — loosen before lifting, tighten in a star pattern, and drive cautiously on the spare — most drivers can handle a flat safely in under 30 minutes.
Whether it’s a sedan on a quiet street, a truck on the highway, or a trailer at a campsite, the fundamentals stay the same: secure the vehicle, work methodically, and prioritize safety over speed. And when conditions aren’t safe to do it yourself, calling in professional help is always the smarter choice.
For more guides on tire care, local services, and trusted shops, explore the TireNearMeHub blog or check out related reads like the Discount Tire Guide 2026, the Mavis Discount Tire Photo Guide, and the Harry’s Discount Tire Photo Guide.